
- Understanding the Basics of Irrigation System Installation Bay Area
- Planning Your Irrigation System Installation Bay Area
- Step-by-Step Guide to Installing Your Irrigation System Bay Area
- Common Challenges in Irrigation System Installation Bay Area
- Maintaining Your Irrigation System Bay Area
- Frequently Asked Questions
Understanding the Basics of Irrigation System Installation Bay Area
What is an Irrigation System?
An irrigation system is a structured method for delivering controlled amounts of water to assist in the growth of crops and landscapes. In the Bay Area, where water conservation and efficiency are crucial due to varying climates and water availability, an effective irrigation system can mean the difference between a flourishing garden and a wilted landscape. These systems can range from simple drip irrigation used in home gardens to elaborate setups servicing large agricultural fields.
Benefits of Installing an Irrigation System
Investing in an irrigation system installation Bay Area offers several benefits. Firstly, it enhances plant health by delivering the right amount of water precisely where it’s needed, minimizing water waste. Secondly, it saves time and labor, reducing the need for manual watering. Thirdly, well-designed irrigation systems can improve property value by maintaining attractive landscapes. Lastly, they contribute to sustainable practices by utilizing water-saving technologies, which is particularly vital in the California climate.
Types of Irrigation Systems Commonly Used
There are several types of irrigation systems tailored to various landscaping needs. Common types include:
- Drip Irrigation: Ideal for gardens, it delivers water directly to the roots of plants, maximizing efficiency.
- Sprinkler Systems: These can be used for large lawns or crops; they mimic rainfall, distributing water over a wide area.
- Soaker Hoses: A flexible option that allows water to seep directly into the soil, beneficial for vegetable gardens.
- Subsurface Irrigation: This system delivers water below the soil surface, reducing evaporation and runoff, making it very efficient.
Planning Your Irrigation System Installation Bay Area
Assessing Your Landscape Needs
The first step in planning your irrigation system is a thorough assessment of your landscape. Understanding the different plants, their water needs, and the layout of your garden is crucial. Factors such as soil type, sun exposure, and wind patterns can impact how much water your garden requires. Consulting with local garden centers or irrigation experts can provide valuable insights specific to the Bay Area’s climate and soil conditions.
Choosing the Right Equipment
Once you have a clear understanding of your landscape’s needs, the next step is selecting the right equipment. This includes choosing high-quality pipes, fittings, and emitters that suit your irrigation type. Look for devices that are adjustable to accommodate changing weather conditions and different plant types. Also, consider investing in moisture sensors and timers that automate the watering process, enhancing efficiency and saving water.
Creating a Cost-Effective Installation Plan
A well-thought-out plan is essential for the successful installation of your irrigation system. Begin with a budget, factoring in the cost of materials, potential labor, and future maintenance expenses. Creating a layout diagram can help visualize the system’s flow, and taking into account existing landscape features will ensure smooth operation. Additionally, consider local regulations or restrictions concerning water usage, which might influence your system’s design.
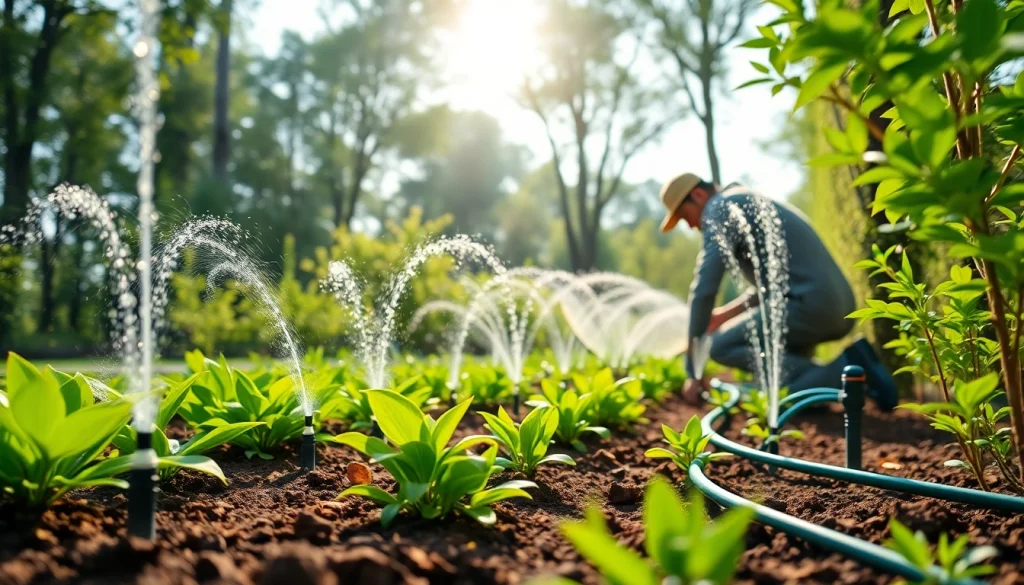
Step-by-Step Guide to Installing Your Irrigation System Bay Area
Preparing Your Yard for Installation
Before beginning your installation, clear the area of any debris, rocks, and unwanted vegetation. Mark the locations for your plants, water source, and proposed pipe routes to ensure your design is practical. Assessing existing connections to water lines will also help streamline the installation process.
Key Installation Steps Explained
The actual installation process typically involves several key steps. Start by laying down the mainline pipes that connect to your water source. Next, install lateral lines that will deliver water to specific areas of your landscape. Ensure that each emitter or sprinkler is evenly spaced to provide uniform coverage. Finally, connect all components securely and test the system for leaks before covering any trenches or holes.
Post-Installation Checks and Balancing
After installation, it’s crucial to perform a series of tests to ensure your system functions correctly. Check for uniform water distribution by observing whether all plants receive adequate moisture. Adjust the sprinkler heads or emitters as necessary to balance flow rates across the system. Regular inspections could prevent significant issues while promoting water efficiency.
Common Challenges in Irrigation System Installation Bay Area
Identifying Problematic Areas in Your Landscape
Identifying areas that require special attention can be challenging. For instance, places with poor drainage may need additional modifications to prevent waterlogging. Conversely, dry areas might require more emitters or sprinkler heads to achieve adequate coverage. Conduct assessments at different times throughout the day to gauge sun exposure and wind effects on water distribution.
Dealing with Non-Ideal Soil Conditions
Soil conditions in the Bay Area can vary widely; some may be clay-heavy, while others may be sandy and quick-draining. Adjusting your irrigation system to accommodate these variations is crucial. For clay soil, slower watering techniques or soaker hoses work well, while sandy soil may require more frequent but shorter watering sessions. Soil amendments can also enhance water retention and improve overall performance.
How to Adjust Your System for Seasonal Changes
As seasons change, so do the watering needs of your landscape. During dry, hot months, you may need to increase watering frequency, while in cooler months, your system may require a significant reduction. Utilize timers and moisture sensors to automate adjustments, ensuring your garden receives the optimal amount of water regardless of the season.
Maintaining Your Irrigation System Bay Area
Routine Maintenance Tasks to Consider
Routine maintenance helps prolong the lifespan of your irrigation system. Regularly inspect the system for leaks, clogs, and damage after every season. Cleaning filters and replacing worn parts proactively can prevent issues down the line. Additionally, check programmable timers and sensors to ensure they are functioning correctly.
Signs Your System Needs Repairs
Being vigilant can save you significant inconvenience. Look for signs such as uneven water distribution, increased water bills, and visible plant stress. These symptoms often indicate leaks or malfunctions in your system, warranting immediate attention to prevent further damage or water waste.
Upgrading Your System for Improved Efficiency
As new technologies emerge in irrigation, consider upgrading your system to improve efficiency. Adding smart controllers that adjust watering schedules based on weather data or integrating rain sensors can significantly reduce water use. Additionally, choosing pressure regulators can optimize flow rates, enhancing the system’s overall effectiveness.
Frequently Asked Questions
What is the best type of irrigation system for a home garden?
Drip irrigation is often the best choice as it conserves water and delivers it directly to the plant roots, promoting healthy growth.
How much does it cost to install an irrigation system?
The cost varies widely based on system type, size, and design complexity, typically ranging from a few hundred to several thousand dollars.
How can I reduce water waste in my irrigation system?
Utilizing timers, moisture sensors, and drip irrigation can significantly reduce water waste by ensuring precise application based on plant needs.
Are there eco-friendly options for irrigation systems?
Yes, options like rainwater catchment systems and drip irrigation are eco-friendly, promoting conservation and efficiency.
When is the best time to install an irrigation system?
The ideal timing is early spring or late fall when the weather is mild, allowing for easier installation and adjustment to seasonal changes.

